


Maya UI refresher and rendering tips.
Some things that trip me up when I jump back into Maya after a break
UI Refresher
View Camera or lights POV from the outliner
- shift o to open the outliner
- Middle click and drag a camera or light into a viewport. This will set the POV of the panel.
Node Editor:
Create a new node – press TAB to bring up a search box, type in the name of the node you want to find (ie. bump) then click on a node in the drop down list. Press TAB (or ENTER ) again to create the node.
Create a link. (see Autodesk Manual )
method 1 – expand the attributes of the source node, Click an output and drag over the input of the target node.If you mouse over a compound attribute, the Node Editor automatically expands to expose its children to which you can make a connection
Method 2 – select the node you want to connect TO . middle click a node and drag the box onto the property in the attribute editor
Assign material to object
Select object in scene. Right click on shader in the node editor, swipe up and choose ‘Assign Material to Viewport Selection’
Hypershader:
Middle click on a material to drag it from the shelf to the work area.
Panels:
use space to swap between a multi-panel view and single panel view
Rendering
Enable Mental Ray Production Shaders:
To expose the mip shaders cut and paste the following script into the MEL command window.
optionVar -intValue "MIP_SHD_EXPOSE" 1;
After restarting MAYA the mip shader nodes should be exposed.
Setup Linear workflow
To set up a Linear workflow in Maya I need to be conscious of inputs and output colour spaces.
Textures need to be set Linear or Gamma colour space by the user. The Default Input Profile can be set to sRGB for textures but
In render settings:
 Enable color management, and set the output color profile to Linear
Render view:
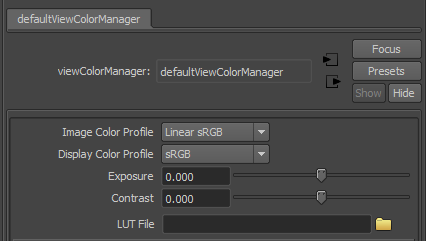
Display > color management > set the Image Color profile to Linear sRGB
AO Pass

Use the surface shader to create an AO pass
Maya Motion vectors
http://forums.cgsociety.org/showthread.php?t=1013000
Sometimes if you add a 2D motion vector pass to a render layer, the output render will be slipped in time. e.g. if you make a render for frame 10 it will do a render for 10.5
In Maya 2014 you need to adjust the motion blur settings to affect when the motion vector is calculated.
- turn ON motion blur in the render dialog ( this exposes the settings and stops them being greyed out )
- set the motion vector to start frame
- turn OFF motion blur in the render dialog
Image Based Lighting
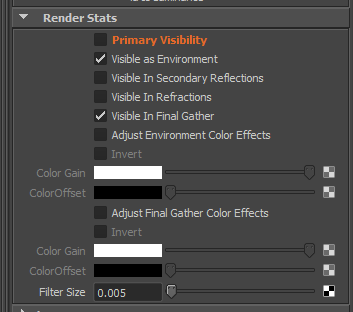 IBL is cool but when using render pass I need to remember to turn it off correctly. Simply hiding the object in the render pass doesn’t work. It needs to be turned off in the IBL dialog.
Rendering Overscan
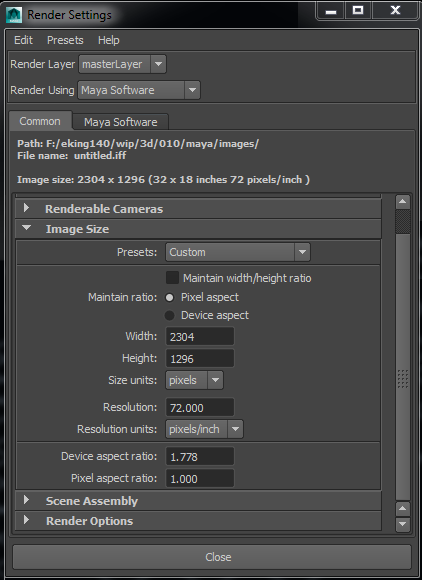
If you need to match an existing image with an overscaned version of the image then do this.
Based on a multiplier, you take your format (e.g. 1920 x 1080). Then multiply it by the percentage you want to overscan.
For example to overscan a 1920 x 1080 plate by 20%.
- Calculate the new frame size.
- 1920 x 1.2 = 2304
- 1080 x 1.2 = 1296
- Put this into the render settings dialog
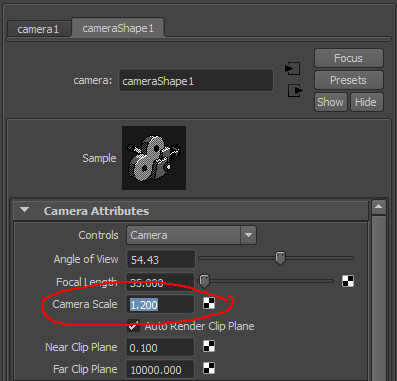
- Finally add the 1.2 value into the camera scale in the attributes editor.
Mental ray Sampling tips
http://www.impresszio.hu/szabolcs/MentalRay/MentalRaySampling.htm
http://forums.cgsociety.org/showthread.php?t=970700