


I have a love hate relationship with zBrush. On the one hand it has an amazing community producing fantastic work, and it’s the industry standard with a unique list of features. On the other hand the UI is an utter disaster, and basically relies on artists learning a vast set of obscure keyboard shortcuts… which is ok if you use it everyday… but if you forget something it can take hours to locate the right button.
Useful zBrush shortcuts
The Topology Brush
- Pick the topo brush. Paint curves on the mesh to represent edge loops.
- Click on the mesh to create the Polys ( note: the thickness is based on the brush draw size )
InsertMultiMesh IMM
M display Meshes
After selecting an InsertMultiMesh brush, simply press the M key to display a floating window which lists all the meshes which are available with this brush
Polygroups
- ctrl + shift + left click — hide polygroup
- ctrl + shift + left click and drag — invert the display
Painting
- C — Colour picker tool – ( this picks the colour for the active slot in the left tool bar … NOT the same as the active colour for your brush. Make sure you always have the right slot active for your brush and colour picker. )
- V — Switch colour
Brush Controls
- L — Lazy brush
- [ or ] — Change brush size
Clip brush
- space to reposition
- double tap to make an angle
Curve Brush
The curve brush IS cool (… i must maxScript something like this one day ). zClassroom has some good tutorials. But its useful to remember:
- Just click (and release ) on the object to start another curve. You can’t go back and edit the curves after you add another one.
- Drag the Brush and Stroke Tabs into the left panel for easy access while working.
- in Stroke > Curve play with Bend, snap, Lock start, and Lock End.
- The curve bursh has two modes red and blue
- To modify the curve size… Change the red brush size, then click the curve again.
Sub Tools
To select sub tools without bringing up the menu. Hold Alt and click the subtool you want to sculpt on
Spotlight
- z — Bring up the spotlight dial
- shift z — activate / deactivate spotlight
- hold Ctrl — to scale and rotate the texture
Transpose
To Centre on the visible part of the mesh, unmasked region or current polygroup, click the white ring at the far end of the transpose line.
zModeler
space – to bring up the action list ( note that you must mouse over a object in the viewport as well )
zBrush Workflows
…why have 1 click workflows when you can have 10 clicks to do the same thing. zBrush just likes to give you more…
Reset zBrush
Go into the Preferences menu and press the “Init ZBrush” button.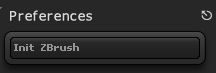
Texturing
Save Textures
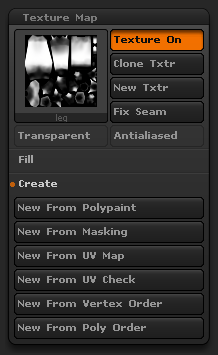 You can’t save textures from the texture map dialog (arg why would I want to do that ?!! ).
- In the texture map dialog. Click the Clone Texture button.
- The texture appears as the current texture for your brush in the left tool bar.
- In the Left toolbar. Click on the texture to bring up the quick pick dialog from which you can export the texture
- Now go back to the left tool bar. Click on the texture again and choose texture off. … Otherwise your brush will use your newly saved texture as a pattern stamp 🙁
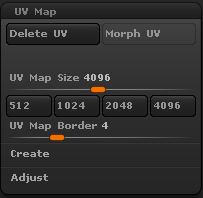 Set new texture sizes in the UV map dialog
…Because if the size controls were in the Texture map dialog that would … you know… make sense…
Spotlight
go into the texture dialog
Import a texture
click the add to spotlight button
Lightbox
To add custom directories to the Lightbox. Add shortcutlinks inside the Pixologic install folders
e.g. To add extra brushes from a network drive. Make a shortcut to the directory of your choice in:-
C:\Program Files (x86)\Pixologic\ZBrush 4R6\ZBrushes
Adjust an Object Pivot In the transform settings
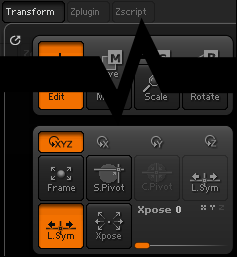
S.Pivot defines the pivot based on the centre of the currently visible mesh.
C.Pivot re-sets the object’s pivot to its original location, after a pivot point has been set using S.Pivot
http://www.polysculpt.com/2009/11/new-pivot-with-zbrush/
Adjust an Object Pivot In the transform settings
ctrl click and drag the transpose line to create a mask on the model.
see more in docs.pixologic.com posing
Apply Displacement
Load your displacement map in as an alpha,
- Alpha – import
- Tool > Displacement map > Intensity – set it to something usually under .1 but it varies.
- Tool > Displacement map> Apply DispMap.
Rendering
Setup AA
First of make the document size twice as big of your desired final render image.
>Document palette>Double button
Then draw your model on canvas and go in edit mode ofc.
Next step is making your document size half its current size. This will take care (more or less) of those jagged edges – some sort of AA.
>Zoom palette>AAHalf button
Setup Lights
Since this is just basic stuff, i won’t explain all about lights – play with them and set them up the way you like it. One thing i would point out is how to take care of noise in your shadows and make them smoother.
> Light palette > Shadow drop down > Rays slider
Raise the number until you shadows become smooth (note this will increase your rendering time)
> Light palette > Shadow drop down > Blur slider
Raise the number and it will blur some of the noise that is in shadows
Again you can play with Shadow Curve and Lenght to change the look of your shadows.
Setup DOF
OK, once you take care of your light(s) and shadows it’s time to add some dof (if you want to).
The quickest way to set this up is to use Preview render and Fog options.
> Render palette > Fog button
Turn it on and open Fog drop down
Now play with Depth1 (‘front’) and Depth2 (‘back’) sliders. How does this work: the part of your model that will be in fog will get blurred and part that is out of fog will be nice and sharp (in focus) when taking final render.
To achieve dof effect on your final render you will have to transfer settings from Fog to Depth Cue.
> Render palette > Depth Cue drop down
just copy Fog depth1 to Depth Cue depth1 and same for depth2
Next turn off Fog button and turn on Depth Cue button under Render palette ofc.
To make the Depth Cue a bit better you should increase the anti aliasing size – this will smooth out the edges.
> Render palette > Antialiasing drop down > Size slider
And one more thing that you can do to improve the overall AA.
> Render palette > Antialiasing drop down > Super Sample slider
Increase to get better results
Best Render
All you have to do now is switch on best render option and render the final image.
> Render palette > Best button
And final step is saving your render
> Document palette > Export
Useful zBrush Downloads
Zeoyn Cutter
I found these brush through digital tutors. It’s good for making sharp grooves. A mix of displace and pinch.
www.artofjose.com zbrush downloads
Badking.com
has a great section of brushes alphas and other tools all free to download.
http://www.badking.com.au/site/