


This is my introduction to the pixel processor in substance designer. It shows the creation of a vector displacement tool and guides you through the functions needed.
This is my introduction to the pixel processor in substance designer. It shows the creation of a vector displacement tool and guides you through the functions needed.
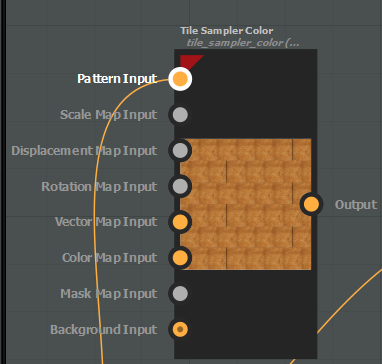
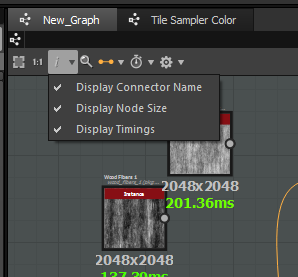 SD is great but when connector names are hidden it can be confusing.
You can display the name of inputs and outputs by clicking on the little “i” icon on top of the graph window and checking Display Connector Names.
The name displayed is defined by the “Label” text field of the input or output node.
Some things that trip me up when I jump back into Maya after a break
Create a new node – press TAB to bring up a search box, type in the name of the node you want to find (ie. bump) then click on a node in the drop down list. Press TAB (or ENTER ) again to create the node.
method 1 – expand the attributes of the source node, Click an output and drag over the input of the target node.If you mouse over a compound attribute, the Node Editor automatically expands to expose its children to which you can make a connection
Method 2 – select the node you want to connect TO . middle click a node and drag the box onto the property in the attribute editor
Select object in scene. Right click on shader in the node editor, swipe up and choose ‘Assign Material to Viewport Selection’
Middle click on a material to drag it from the shelf to the work area.
use space to swap between a multi-panel view and single panel view
To expose the mip shaders cut and paste the following script into the MEL command window.
optionVar -intValue "MIP_SHD_EXPOSE" 1;
After restarting MAYA the mip shader nodes should be exposed.
To set up a Linear workflow in Maya I need to be conscious of inputs and output colour spaces.
Textures need to be set Linear or Gamma colour space by the user. The Default Input Profile can be set to sRGB for textures but
 Enable color management, and set the output color profile to Linear
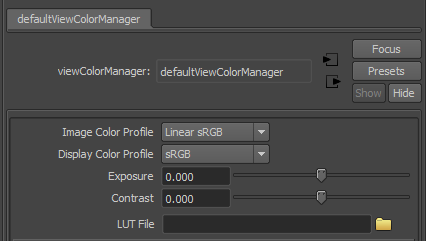
Display > color management > set the Image Color profile to Linear sRGB

Use the surface shader to create an AO pass
http://forums.cgsociety.org/showthread.php?t=1013000
Sometimes if you add a 2D motion vector pass to a render layer, the output render will be slipped in time. e.g. if you make a render for frame 10 it will do a render for 10.5
In Maya 2014 you need to adjust the motion blur settings to affect when the motion vector is calculated.
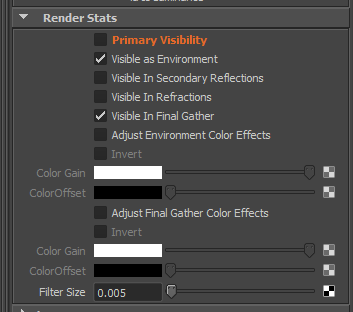 IBL is cool but when using render pass I need to remember to turn it off correctly. Simply hiding the object in the render pass doesn’t work. It needs to be turned off in the IBL dialog.
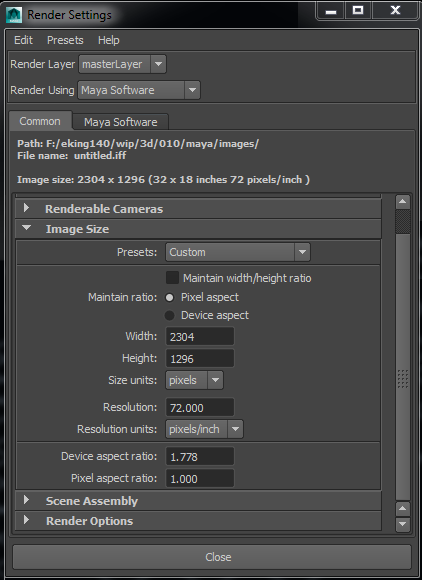
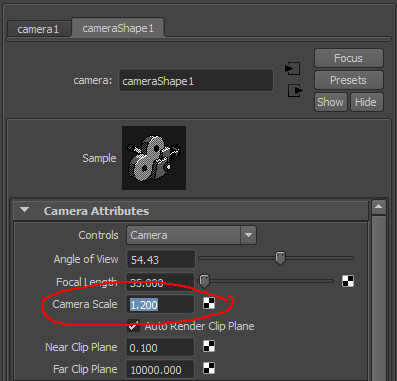
If you need to match an existing image with an overscaned version of the image then do this.
Based on a multiplier, you take your format (e.g. 1920 x 1080). Then multiply it by the percentage you want to overscan.
For example to overscan a 1920 x 1080 plate by 20%.
http://www.impresszio.hu/szabolcs/MentalRay/MentalRaySampling.htm
http://forums.cgsociety.org/showthread.php?t=970700
![]() Most illustrator tools have a bunch of extra features only accessible using short cuts.
Most illustrator tools have a bunch of extra features only accessible using short cuts.
Here’s a selection of tips and shortcuts useful for inking images.
Import your bitmap (scanned) artwork on the art board by using (File > Place). With the artwork selected got to (Object > Live Trace > Tracing Options…). There are several presets within the Tracing Options window, or you can use the controls to fine tune your own settings.
After your object is traced click (Object > Expand) to turn your artwork into editable paths.
It’s also useful to (Object > Ungroup) a few times
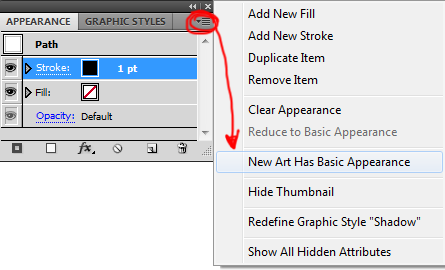 To stop the stroke settings reverting to basic with each new path.
This is a reflex action for me now. … I hate losing work from a crash…
See this article describing how to Move the folder and reset the Illustrator preference.
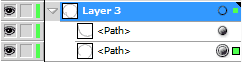
In brief… if you select multiple paths on the artboard you can then click on the small coloured square in the layer view to drag that selection to a new layer. (e.g. In the image the above, click and drag the top right green square ). There is a more detail explanation here .
When tracing an image its easier if it’s faded. Double click the Layer to bring up the Layer Options dialog. click on the ‘Dim Images To:’ check box and the type in a value for the percentage. Note double click the Layer NOT the image
ctrl click a Layer Eye icon to set that layer to outline mode
Alt click a Layer Eye icon to hide everything but that layer.
With the selection tool (V) double click to enter isolation mode.
Double click a tool in the tool bar to bring up its settings dialog.
Double click to enter isolation mode
There’s a lot a features in the pen tool depending on where and when you click on stuff…
Instead of using the ‘Direct Selection Tool’ (white pointer) to select the end point, you use the regular Pen Tool to select the endpoint first, then you can keep drawing like usual!
hold Alt and drag – creates a rectangular selection and erases everything inside it.
To edit a path with width, it can be transformed into a closed vector fill. Select the curve and go to Object > Expand Appearance
Toggle outline mode on or off by pressing ctrl Y. Useful when selecting points becomes tricky
Note: ctrl click a Layer eye icon to set that layer to outline mode
Toggle smart guides on or off by pressing ctrl U
I have a love hate relationship with zBrush. On the one hand it has an amazing community producing fantastic work, and it’s the industry standard with a unique list of features. On the other hand the UI is an utter disaster, and basically relies on artists learning a vast set of obscure keyboard shortcuts… which is ok if you use it everyday… but if you forget something it can take hours to locate the right button.
M display Meshes
After selecting an InsertMultiMesh brush, simply press the M key to display a floating window which lists all the meshes which are available with this brush
The curve brush IS cool (… i must maxScript something like this one day ). zClassroom has some good tutorials. But its useful to remember:
To select sub tools without bringing up the menu. Hold Alt and click the subtool you want to sculpt on
To Centre on the visible part of the mesh, unmasked region or current polygroup, click the white ring at the far end of the transpose line.
space – to bring up the action list ( note that you must mouse over a object in the viewport as well )
…why have 1 click workflows when you can have 10 clicks to do the same thing. zBrush just likes to give you more…
Go into the Preferences menu and press the “Init ZBrush” button.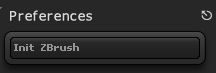
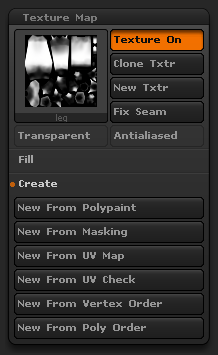 You can’t save textures from the texture map dialog (arg why would I want to do that ?!! ).
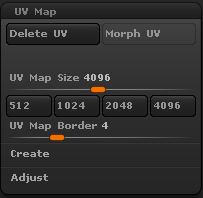 Set new texture sizes in the UV map dialog
…Because if the size controls were in the Texture map dialog that would … you know… make sense…
go into the texture dialog
Import a texture
click the add to spotlight button
To add custom directories to the Lightbox. Add shortcutlinks inside the Pixologic install folders
e.g. To add extra brushes from a network drive. Make a shortcut to the directory of your choice in:-
C:\Program Files (x86)\Pixologic\ZBrush 4R6\ZBrushes
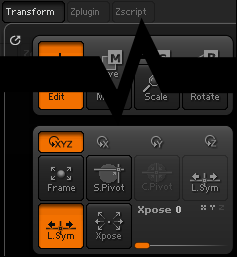
S.Pivot defines the pivot based on the centre of the currently visible mesh.
C.Pivot re-sets the object’s pivot to its original location, after a pivot point has been set using S.Pivot
http://www.polysculpt.com/2009/11/new-pivot-with-zbrush/
ctrl click and drag the transpose line to create a mask on the model.
see more in docs.pixologic.com posing
Load your displacement map in as an alpha,
First of make the document size twice as big of your desired final render image.
>Document palette>Double button
Then draw your model on canvas and go in edit mode ofc.
Next step is making your document size half its current size. This will take care (more or less) of those jagged edges – some sort of AA.
>Zoom palette>AAHalf button
Since this is just basic stuff, i won’t explain all about lights – play with them and set them up the way you like it. One thing i would point out is how to take care of noise in your shadows and make them smoother.
> Light palette > Shadow drop down > Rays slider
Raise the number until you shadows become smooth (note this will increase your rendering time)
> Light palette > Shadow drop down > Blur slider
Raise the number and it will blur some of the noise that is in shadows
Again you can play with Shadow Curve and Lenght to change the look of your shadows.
OK, once you take care of your light(s) and shadows it’s time to add some dof (if you want to).
The quickest way to set this up is to use Preview render and Fog options.
> Render palette > Fog button
Turn it on and open Fog drop down
Now play with Depth1 (‘front’) and Depth2 (‘back’) sliders. How does this work: the part of your model that will be in fog will get blurred and part that is out of fog will be nice and sharp (in focus) when taking final render.
To achieve dof effect on your final render you will have to transfer settings from Fog to Depth Cue.
> Render palette > Depth Cue drop down
just copy Fog depth1 to Depth Cue depth1 and same for depth2
Next turn off Fog button and turn on Depth Cue button under Render palette ofc.
To make the Depth Cue a bit better you should increase the anti aliasing size – this will smooth out the edges.
> Render palette > Antialiasing drop down > Size slider
And one more thing that you can do to improve the overall AA.
> Render palette > Antialiasing drop down > Super Sample slider
Increase to get better results
All you have to do now is switch on best render option and render the final image.
> Render palette > Best button
And final step is saving your render
> Document palette > Export
I found these brush through digital tutors. It’s good for making sharp grooves. A mix of displace and pinch.
www.artofjose.com zbrush downloads
has a great section of brushes alphas and other tools all free to download.
http://www.badking.com.au/site/