


Shadows help place the CG elements in the world. Literally grounding it in reality. Rendering them is easy, but for more control we need to separate the shadow layer for compositing. Creating them in 3dsMax isn’t hard and here’s how to setup V-Ray to separate the necessary passes.
I’m not going to detail matching cameras to the real world in this article. In brief we need:-
- Our CG character
- A proxy mesh that represents the ground in the real world.
- A V-Ray camera matched to the lens and film back of the production camera
- Appropriate V-Ray Lights
We use the ground proxy to receive shadows cast by our CG character. This will be the shadow layer we composite into the final shot.
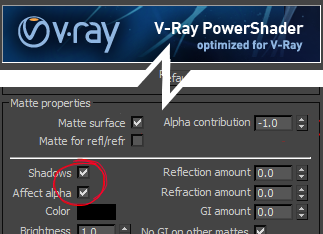
The VRayMtlWrapper
The VRayMtlWrapper is a great tool for creating shadow and mask passes. There are 4 settings you need to know.
- Matte surface
- Alpha contribution
- Shadows
- Affect alpha
Matte Surface
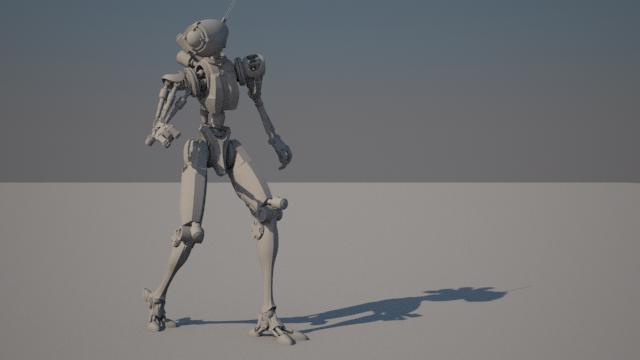
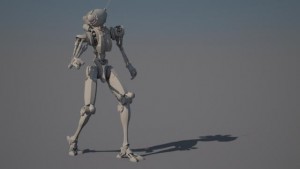
Robot as Matte Surface
Makes the material appear as a matte, which shows the background, instead of the base material, when viewed directly. Matte objects can be used to occlude or hide other objects in the scene.
Alpha contribution
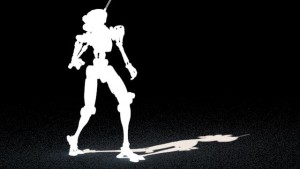
Robot with Alpha Contribution 1

Robot with Alpha Contribution 0
Robot with Alpha Contribution -1
Alpha contribution allows you to control how the object will appear in the alpha channel. A value of:
- 1.0 means that the object will appear normally in the alpha channel.
- 0.0 means that the object will not be present in the alpha channel at all.
- -1.0 will invert the alpha of the object.
Note:
- This material parameter does not require the object to be a matte object.
- A matte object does not change the appearance of the alpha channel unless its Alpha contribution is setup.
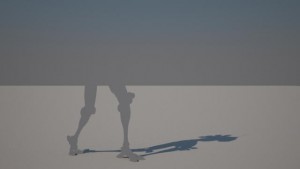
Shadows
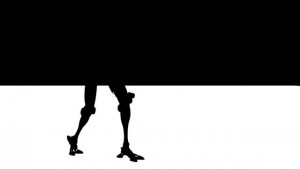
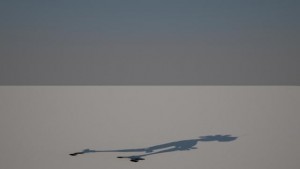
Ground plane as Mattesurface with shadows on
turn this on to make shadows visible on the matte surface.
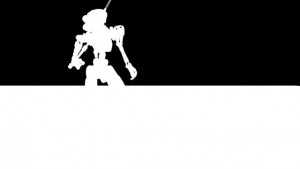
Affect Alpha
Turn this on to make shadows affect the alpha contribution of the matte surface. Areas in perfect shadow will have a white alpha, while completely shadowless areas will have a black alpha.
ground as Mattesurface with Alpha_Contribution -1
See more in the VRay help docs
How to set up the render pass
Set up a matte material
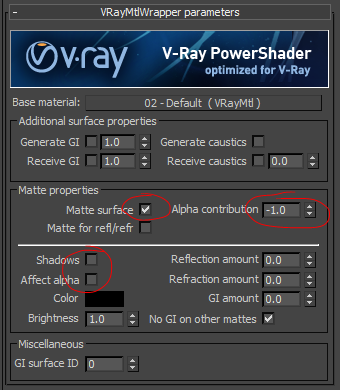
- Use the VRayMtlWrapper material
- Set ‘Base material’ to ‘VRayMlt’
- enable ‘Matte surface’
- change ‘Alpha contribution to’ -1.0.
- DISABLE ‘Shadows’
- DISABLE ‘Affect alpha’
Set up the matte shadow material
- Use the VRayMtlWrapper material
- Set ‘Base material’ to ‘VRayMlt’
- enable ‘Matte surface’
- change ‘Alpha contribution to’ -1.0.
- ENABLE ‘Shadows’
- ENABLE‘Affect alpha’
Hiding the Subject
It’s useful to hide the subject before rendering the shadow. This prevents the edge pealing away if you blur it in post.
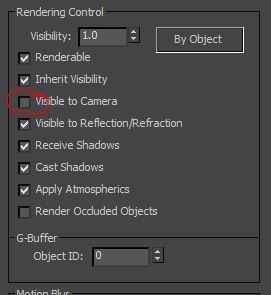
To do this simply go into the object properties dialog and turn off “visible to camera.”
Read this article for tips on how to deal with Reference’s
http://www.designimage.co.uk/making-3dsmax-xref-scene-objects-invisible-to-the-camera/
VRay MatteShadow Element

The VRay Shadow element is unusual. It is not, strictly speaking, a part of the image; however, it can be added to the Raw Lighting element to adjust the shadow intensity. Simply adding the two elements produces lighting as though no shadows were computed.
Tip: Use State sets
After Autodesk fixed its flaky initial implantation, I’ve come to love 3dsMax State sets.
In brief its worth setting up state sets for different technical passes where you are changing materials. This allows you re-render a collection of passes at the touch of a button if you have to change the animation.