Costing animation: good ideas with a good stories win

Da_n_flowersThe art of budget animation is much like the art of budget live action movies. Can we create something compelling with a small cast of characters in a single location? The answer is of course ‘yes we can’ given a good idea and a good script.

With animation I find there are three categories of cost

  • Cost to plan
  • Cost per asset
  • Cost per shot

Cost to plan

  • Script
  • mood boards and concept art.
  • storyboards
  • Management and scheduling

Cost per asset

(per character , per environment , per prop )

  • Modelling
  • Rigging ( connecting the model to a skeleton for animation
  • texturing ( The colour of the surface )
  • material shaders ( how the surface responds to light … is reflective, dusty, matte transparent etc… )

Cost per shot

  • Animation time
  • special FX expositions etc
  • Lighting and rendering
  • Compositing (layering different images and movies together to create the final shot )
  • Sound design
  • Music
  • Editing

For a fully CG animation literally every blade off grass must be made and placed in our virtual world, and every hair on a characters head must be combed into place. We must be virtual makeup artists, carpenters, hairdresser, tailors, photographers etc.. All the jobs of a liveaction movie are recreated virtually.

Photoreal CG is a lot of work. Costs will add up into thousands of pounds per character and per shot. With games costing many millions to create there are huge marketing budgets, and we have been wowed by many epic animations costing hundreds of thousands.

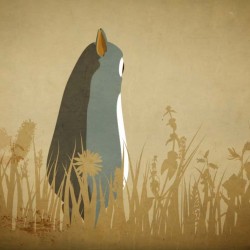
So the art of budget animation is to minimise the number of locations and the size of the cast. But With animation we also have the advantage of creating simplified styles (like southpark or monty pythons cutout animation ) and this can greatly reduce costs.

We have a range of styles to chose from. Here they are in order of cost

  • Stills with sound and music ( like a moving comic )
  • 2d Animated Cartoon Cutouts
  • 3d Animation in a cartoon style
  • 3d Characters composited into photographed environments
  • 3d characters in fully 3d worlds

… good ideas with a good stories win

With a good script all of these styles can deliver a compelling story. We can blind our audience with stunning visual FX. But a good idea with a good story will do the job just as well, and we can get the message across  for considerably less money.

On the flip side holes in the script only get worse as the production develops. Its very hard to fix a bad story in post…

A good production methodology helps.

The deeper into the production we get the longer everything takes. There’s no point polishing a shot if it’s not needed. Good story boards and previs will save time in the long run.

This process is beautiful described in this short  The story of animation


Amazing short: Keloid by big lazy robot

This really is spectacular. A trailer for a film that may never be made. It’s collection ideas around a common theme, and pulls us into a story that we want to be told.

Created in their spare time by the most awesome guys from biglazyrobot it took more than two years to make. … and though they say its a story about humans … it does feature some bad ass robots 🙂

These guys also worked on the equally amazing short the gift and the very cool Swedish House Mafia video Greyhound

Useful Tips and short cuts for inking in Illustrator

Adobe-Illustrator-logoMost illustrator tools have a bunch of extra features only accessible using short cuts.

Here’s a selection of tips and shortcuts useful for inking images.

TIPS

Live Trace

Import your bitmap (scanned) artwork on the art board by using (File > Place). With the artwork selected got to (Object > Live Trace > Tracing Options…). There are several presets within the Tracing Options window, or you can use the controls to fine tune your own settings.

  • Check the preview check box to see your settings applied in real time.
  • If its a black and white image check the ignore white checkbox in Trace Settings. This will prevent unneeded white filled paths from being created.
  • When you are satisfied click the Trace button.

After your object is traced click (Object > Expand) to turn your artwork into editable paths.

It’s also useful to (Object > Ungroup) a few times

Preserve stroke settings while creating several paths with the pen or pencil tool.

Illustrator_stroke_settings To stop the stroke settings reverting to basic with each new path.

  • open the Appearance panel ( Window > Appearance),
  • select the fly-out menu
  • deselect New Art has Basic Appearance.

Ctrl s to quick save.

This is a reflex action for me now. … I hate losing work from a crash…

If strange things happen because of corrupt settings

See this article describing how to Move the folder and reset the Illustrator preference.

CYMK to RGB

  • Go to File » Document Color Mode and check RGB.
  • Select everything in your document and go Filter » Color » Convert to RGB.

Layers TabAi_layers

Move selection to new layer

In brief… if you select multiple paths on the artboard you can then click on the small coloured square in the layer view to drag that selection to a new layer. (e.g. In the image the above, click and drag the top right green square ). There is a more detail explanation here .

Dim the image.

When tracing an image its easier if it’s faded. Double click the Layer to bring up the Layer Options dialog. click on the ‘Dim Images To:’ check box and the type in a value for the percentage. Note double click the Layer NOT the image

Visibility

ctrl click a Layer Eye icon to set that layer to outline mode

Alt click a Layer Eye icon to hide everything but that layer.

With the selection tool (V) double click to enter isolation mode.


Tool shortcuts.

Tool settings

Double click a tool in the tool bar to bring up its settings dialog.

Selection tool (V)

Double click to enter isolation mode

Direct selection tool (A)

  • hold alt then click to break a handle

Pen tool (P)

There’s a lot a features in the pen tool depending on where and when you click on stuff…

While drawing with the pen tool you can:

  • Choose the ‘Direct Selection Tool’ first ( the white pointer) then the pen tool. While using the pen tool hold ctrl to use the direct selection tool.
  • While dragging out anchor points – hold space to move the knot – hold alt to break the handles
  • While drawing click then drag on the last endpoint to adjust the Bezier Handle for the next path segment. You can also hold alt to break the handles or simply click  and let go to make the next line straight.

Extending Paths with the pen tool

Instead of using the ‘Direct Selection Tool’ (white pointer) to select the end point, you use the regular Pen Tool to select the endpoint first, then you can keep drawing like usual!

Eraser tool (shift E)

hold Alt and drag – creates a rectangular selection and erases everything inside it.

Width tool (shift W)

  • escape key to deselect a width point
  • hold alt to only adjust one side of a width point
  • hold alt and drag to copy a width point
  • use Shift to select multiple width points
  • use the Delete key to remove width points
  • double click a wp to access the Width Points Edit dialog.

To edit a path with width, it can be transformed into a closed vector fill. Select the curve and go to Object > Expand Appearance

Shape Builder Tool (shift M)

  • alt to subtract
  • drag a line to select multiple shapes
  • shift drag – drag out a marquee and select multiple shapes

Blob Brush tool (shift B)

Outline mode (ctrl Y)

Toggle outline mode on or off by pressing ctrl Y. Useful when selecting points becomes tricky

Note: ctrl click a Layer eye icon to set that layer to outline mode

Smart guides (ctrl U)

Toggle smart guides on or off by pressing ctrl U

Faking Reflections on set.

It’s all smoke and mirrors.

This came up recently because there was no glass in the window of the set. All the reflections were to be added in post from photos…. but when the actor stood at the window the Director wanted to see his reflection.

This is a simple trick for a locked off shot. The action is filmed with two cameras one for the main image and a 2nd camera for the refection.

You can find the position of the main camera simply by reflecting the main cameras position in the mirror plain.

  • Both cameras are equidistant from the mirror and targeted at the same point on the mirror plain.
  • A line connecting the nodal point ( focal center ) of each camera is perpendicular to the mirror ( at 90° )
  • both cameras should have the same FOV.


Fake_reflections

Amazing Short: Stardust

My Dad was in the Uk space program. As a kid I touched instruments that would fly to the farthest reaches of the solar system. It fueled my imagination. I found this on vimeo, and it reminded me of those exciting, mysterious days. It’s just beautiful. 🙂

PostPanic’s short film, Stardust, is a story about Voyager 1 (the unmanned spacecraft launched in 1977 to explore the outer solar system).