Helium. Node based workflows for 3dsMAX

I’ve been doing a lot of MAX plugin research recently. One thing that keeps coming up is how cool node base workflows are. If I’m designing a procedural effect I want a mathematical sketch pad and thats what schematic views give me. One day I might make the leap to Houdi but at the moment I’m heavily invested in 3dsMax.

If your into designing your own tools the it’s worth checking out Helium. It’s free and has been used by a bunch of developers for there products. Notably Krakatoa’s Magma Flow editor.

There’s also the MAXscripted building generator by Tyson Ibele
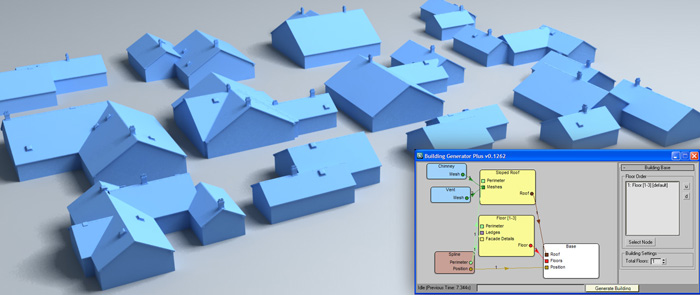
So … at some point ( when I have the time ) what i’d like to do is a cutdown clone of superflow elements but based the Helium editor.

Tutorial #002 – Parametric Superflow from V-MOTION on Vimeo.

Free Scripts and plugins links

Some of the scripts and plugins I’ve been using.

Bulk rename utility

Free to download Bulk rename utility does what is says. It invaluable for fixing the names of broken file sequences. The UI is a little complex but it’s very versatile once you get used to it.

Greeble

Greeble the legendary detailing plugin. Great for mocking things up quickly.
greeble 3dsMax plugin

Soulburn Scripts

Neil Blevin has a big useful script pack Soulburn Scripts. He also has and interesting blog.

Wrap It

wrapit is great for retopologising hi res meshes in max

BerconMaps

BerconMaps  procedural materials for Max: Wood, Noise, Tile, Gradient and Distortion. All of them are 3D maps except for Tile. They will work with scanline, V-Ray, finalRender and Brazil… BUT alas not Mental Ray.Becon maps Plugin for 3dsMax

Clone

clone is a free plugin that does what it says on the tin. I’ve been using it production. It’s stable and a great time saver.

itoosoft Clone

Radial Symmetry

Radial Symmetry not free but super cheap ($20) an awesome time saver and a great creative tool

Max exr motion blur setup

3dsMax EXR motion vectors.

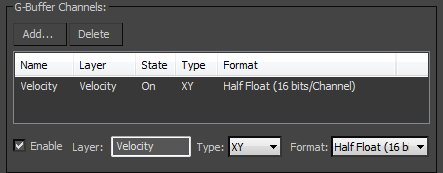
The best option is to use the Motion vector G-buffer in 3dsMax.
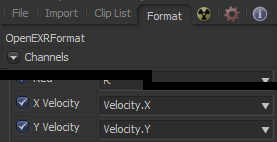
X : positive is Right – Negative is Left
Y: positive is Down – Negative is Up

In Fusion

3dsMax EXR Motion vector in Fusion


Using the G-buffer fusion in is simple.

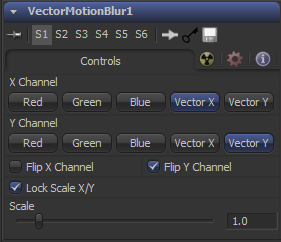
In the Loader chose the G-buffer channels for the X and Y velocity.


Then flip the Y channel in the VectorMotionBlur tool to point the vectors in the correct direction.
 

In Autodeck Composite (toxik)

The Toxik blur tool is actually very cool. The fact that DOF and motion blur are packaged together in one tool is a real advantage over Eyeon Fusion.

This video covers motion vectors in 3dsMax and Autodeck Composite (toxik). But the information can be generically applied. There’s a couple of issues which he fixes in his next video

VideoTip #18 – How to use a Motion Vector pass from MAX’s Scanline renderer!

There’s also a longer in depth look at motion vectors and some fixes if the tools don’t quite behave as they should do.

VideoTip#21 – In-depth view of Motion Vectors from MAX to Composite!


Dumb 3dsMax Tip of the day … lock the camera

Lock 3dsMax CameraSo I’m in 3dsMax. I’ve painstakingly animated a scene for hours and instinctively middle mouse drag to change view. I’ve now accidentally animated the camera… but I don’t notice until an hour later…. arg

Lock the camera before animating your shot.

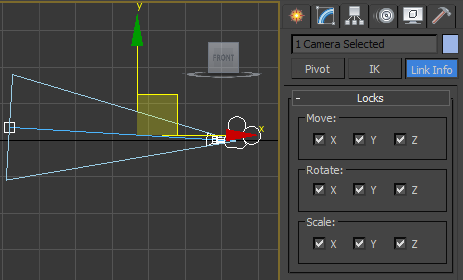
Select the camera (and Target). Go to the hierarchy panel > link info > locks , and check all the boxes for movement rotation and scale.

and with a bit of MaxScript…

This will lock the transform of the current object selection:-

setTransformLockFlags selection #all

This will lock the transform of all cameras in the scene:-

setTransformLockFlags cameras #all