Tell me what you think
Sign up to my youtube channel for tutorials and my twitter feed for updates. I’m thinking of making the scriptpack only available if you subscribe to a mailing list. The scriptpack will remain free but I’d like setup a patreon for some new things I have in mind.
Tell me what you think in the comments below.
Download and unzip
The first thing to do is download the scriptpack from gumroad:
free scriptpack download
Donations not matter how small will help pay for bug fixes and updates. But just type 0 in the text box to download for free.
Automatic Installation
These maxScripts should install automatically using one of two methods. First open 3dsMax then either:
- With Max open drag and drop the KenzorsScriptPack.mzp file onto a max viewport
- or from the 3dsMax menu bar pick MAXScript > Run and choose the KenzorsScriptPack.mzp file
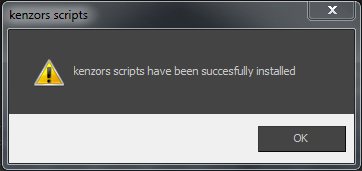
If everything works you should see this message. 
Manual Installation
Sometimes windows permissions can get in the way of the automatic install. However If the automatic installation fails for some reason, you can simply copy the files to the correct location manually. A .mzp file is simply a renamed .zip file. To install the scripts by hand you just have rename it and unzip it.
- Rename KenzorsScriptPack.mzp to KenzorsScriptPack.zip
- Unzip the files keeping the folder structure.
- Copy the KenzorsScripts folder and its contents to your 3dsMax ‘user scripts‘ directory.
- Copy the userMacros folder and its contents to your ‘userMacros‘ directory.
- Copy the userIcons folder and its contents to your ‘userIcons‘ directory.
You can check you ‘user paths‘ in max by going to the menubar.. .. Customise > Configure System Paths > select the ‘System’ tab > and checking the paths for ‘Additional Macros’ ‘Additional Scripts’ and ‘Additional Icons’ You can also find paths by using the getDir comand in the the maxScript listener window like this.
getdir #userMacros
getdir #userIcons
Another tip is to use the shellLaunch command to open the windows folder. So this will open Windows Explorer at C:\Temp\SomeFolder (if it exists).
shellLaunch "explorer.exe" "c:\\temp\\somefolder"
This means you can open the userIcons folder directly using maxscript like this
shellLaunch "explorer.exe" "$userIcons"
shellLaunch "explorer.exe" (getdir #userIcons)
Running the scripts
The MaxScripts are run using my ‘Script Navigator’ utility or by simply navigating to the .ms file in 3dsmax Instructions and videos for these MaxScripts can be found on my maxScript page and on my youtube channel.
Further information
I’ll be posting updates to my profile on scriptspot For those of you that are interested the guys at scriptspot.com have written this post about maxScript it’s history and how to use it. http://www.scriptspot.com/3ds-max/tutorials/script-installation-in-3ds-max
Autodesk
3ds max maxScript help
autodesk-3ds-max overview


