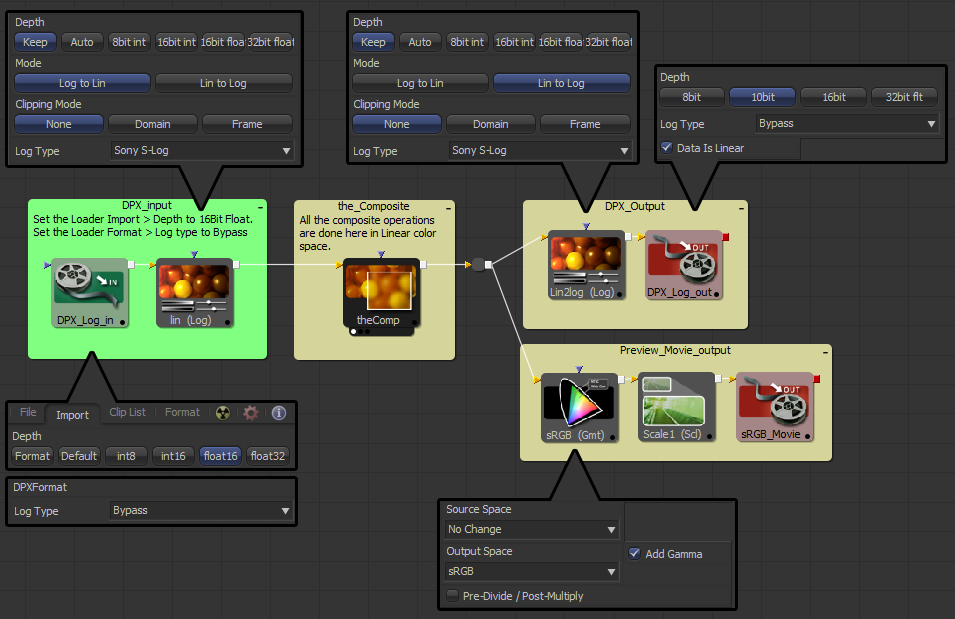
This will show you step by step the basic Log color to Linear color workflow I’m using in Fusion. It replicates what the DoP and Director saw on their monitor when the footage was shot. It’s short and sweet. But I have links to good articles if you want to know more about Log colour.
Category Archives: Compositing
Introduction
This tutorial will shows the relationship between Filmback, Aperture, Field of View, and Lens size.
Understanding the 3dsMax camera filmback is useful if you want to replicate real world cameras or accurately extend the frame size and crop it later in a composite package.
The setup for the 3dsMax camera is slightly buried. To replicate real world cameras we’ll look in two areas: the render dialog and the camera dialog.
To simplify the process I have developed this MaxScript which is free to download here.
Like it or not spreadsheets are just too useful. Having the right formula to hand can really make things easier. Plus for me writing a bit of code serves to alleviate the tedium of data entry.
This expression will calculate the difference between two timecodes and spit out the answer in frames. Each cell must written using 11 characters in the standard timecode format. e.g. 10:23:07:24
This version works at 25 FPS and will subtract the IN point cell ‘G4’ from the OUT point cell ‘H4’.
((MID(H4;1;2)*3600+MID(H4;4;2)*60+MID(H4;7;2))*25+MID(H4;10;2))-((MID(G4;1;2)*3600+MID(G4;4;2)*60+MID(G4;7;2))*25+MID(G4;10;2))
You can change the frame-rate by swapping the 25 for a different number.
How it works
The MID function simply grabs individual characters from a cell.
MID(H4;7;2)
Will grab 2 characters from cell H4 starting with the 7th character in the string.
E.g. It will grab 07 from 10:23:07:24
MID(H4;7;2))*25
07 seconds * 25 fps = 175 frames
3dsMax EXR motion vectors.
 The best option is to use the Motion vector G-buffer in 3dsMax.
X : positive is Right – Negative is Left
Y: positive is Down – Negative is Up
In Fusion

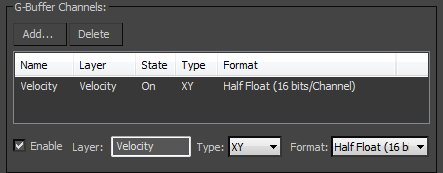
Using the G-buffer fusion in is simple.
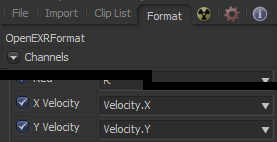
In the Loader chose the G-buffer channels for the X and Y velocity.
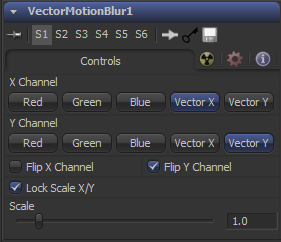
 Then flip the Y channel in the VectorMotionBlur tool to point the vectors in the correct direction.
In Autodeck Composite (toxik)
The Toxik blur tool is actually very cool. The fact that DOF and motion blur are packaged together in one tool is a real advantage over Eyeon Fusion.
This video covers motion vectors in 3dsMax and Autodeck Composite (toxik). But the information can be generically applied. There’s a couple of issues which he fixes in his next video
VideoTip #18 – How to use a Motion Vector pass from MAX’s Scanline renderer!
There’s also a longer in depth look at motion vectors and some fixes if the tools don’t quite behave as they should do.
VideoTip#21 – In-depth view of Motion Vectors from MAX to Composite!
Its simple really.
Now with latest version of eyeon Fusion working camera LUT’s couldn’t be easier. The profiles are all included. The my new workflow is very simple.


